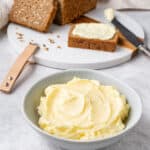
Always velvety and versatile, Butter is easier to make than you’d think!

One time, while scrolling through Instagram, I stumbled upon a reel of a young woman churning butter the old-fashioned way. She couldn’t have been much older than me, yet there was a baby on her hip and a wooden churner between her knees. I thought: “Wow! She’s so down-to-earth, a real ‘Mother Nature’ type. I want to be more like that.” Now, I can make butter just as creamy and fresh as hers in the comfort of my own kitchen, and so can you!
While this butter recipe doesn’t involve a traditional wooden churner, it does call for some modern appliances like a food processor or stand mixer. If you’ve got these, you’re golden, and so will be your butter!
The only ingredients you need are heavy cream, ice water, and salt. But you can keep it unsalted if you prefer, which is the beauty of this recipe! It’s dynamic, and you get to control both the quality of ingredients and the kind of technology you use. Overall, this is a great way to learn how to make butter without sweating for hours over a big wooden churner.
Is Butter Healthy?
In general, butter is typically high in fat, and since it’s dairy, some people might not find it suitable for their diets. But in my opinion, making your own butter from scratch is more health-conscious than getting it from the store because it’s fresher and you can control how much salt you add to it. Plus, you can churn love into it while you make it!  This recipe is gluten-free and sugar-free, and if you so choose, it can also be salt-free.
Sweeten The Deal By Making Honey Butter
As I said, this recipe is so dynamic and versatile, you can use it with any recipe that calls for butter. But did you know that you can also mix honey into it and create a sweet, buttery spread? Honey butter is so luscious, you’ll want to spread it on everything, from toast to pancakes or waffles. Honey butter turns butter into something like a frosting, which transforms any breakfast or brunch into a very early dessert!
INGREDIENTS
- 2 cups heavy cream (high fat content, cold)
- Ice water
- Salt (optional, to taste)

INSTRUCTIONS
Whip
Whip heavy cream until it separates into butter and buttermilk.
Separate
Use ice water to help separate the butter further and strain.
Finish
Squeeze out liquid and add salt if desired.
Devour!

FAQs & Tips
In an airtight refrigerated container, homemade butter will last for up to 2 weeks. Make sure to pour out any excess moisture before storing it. You can also freeze it for up to 3 months. If you go this route, I recommend portioning the butter into ice cube trays for easy use. Once the cubes are frozen, add them to a freezer-safe bag and store in the freezer.
This recipe calls for heavy cream, but you can also use whipping cream. Make sure it’s cold and has a high fat content. I recommend getting a brand that uses cream from organic grass-fed cows, as that kind will likely contain the most nutrients and give you a better butter overall.
Cow’s milk contains beta-carotene, which gives the milk its yellow tint. Goat’s milk, on the other hand, produces a bright white butter because it doesn’t have beta-carotene. So feel free to experiment with your milk or cream and find the option that works well for you.

Serving Suggestions
As I said, this butter goes great in any recipe that calls for butter. For example, you can slather this butter onto some Whole Wheat Healthy Pumpkin Pancakes and beat your fall breakfast cravings. You could also spread it on Healthy French Toast or Peanut Butter Banana Bread.
For savory dinner options, try it on Quick Baked Potatoes, Boiled Green Beans, or Steak with Garlic Butter and Mushrooms. That last one will leave you with a homemade garlic-infused butter that is out of this world!

How to Make Butter
Ingredients
- 2 cups heavy cream high fat content, cold
- Ice water
- Salt optional, to taste
Instructions
-
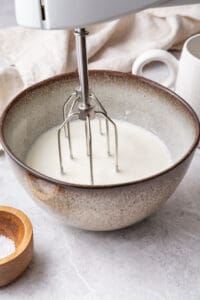
Place the cold heavy cream in a food processor, stand mixer, or use an electric whisk.

-
Whip the cream on a medium-high speed until it starts to thicken and eventually separates into butter solids and buttermilk, about 8-10 minutes.
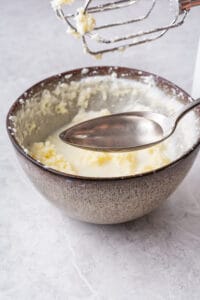
-
Once the cream separates, pour in a small amount of ice water. This helps to further separate the butter from the buttermilk. Continue to process for another minute.
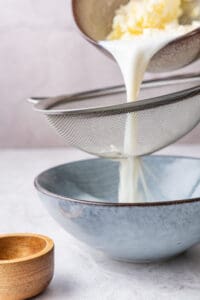
-
Strain the mixture through a sieve to remove the buttermilk (save it for other recipes if desired).
-
Squeeze the butter solids in a clean cloth to remove excess liquid. Mix in salt to your taste, if desired.
Nutrition
The post How to Make Butter appeared first on Food Faith Fitness.