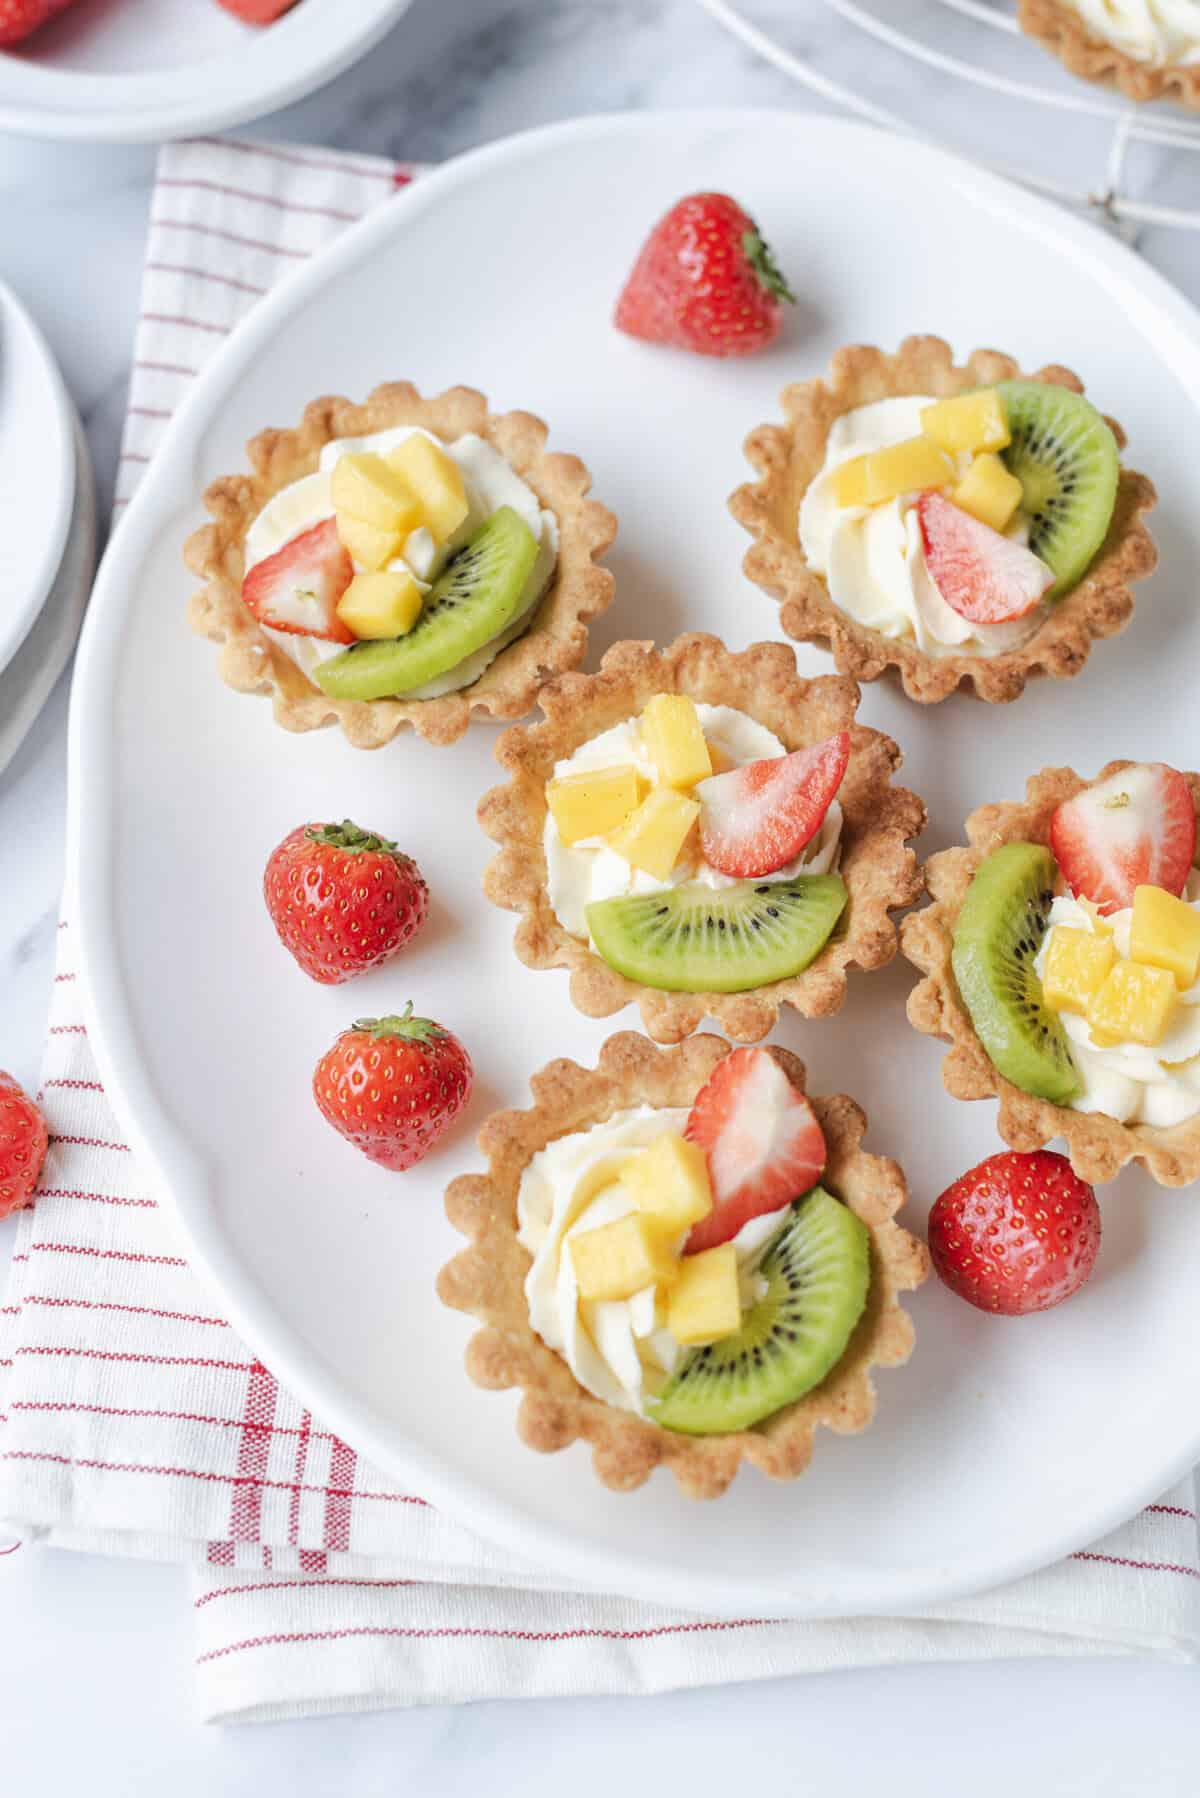
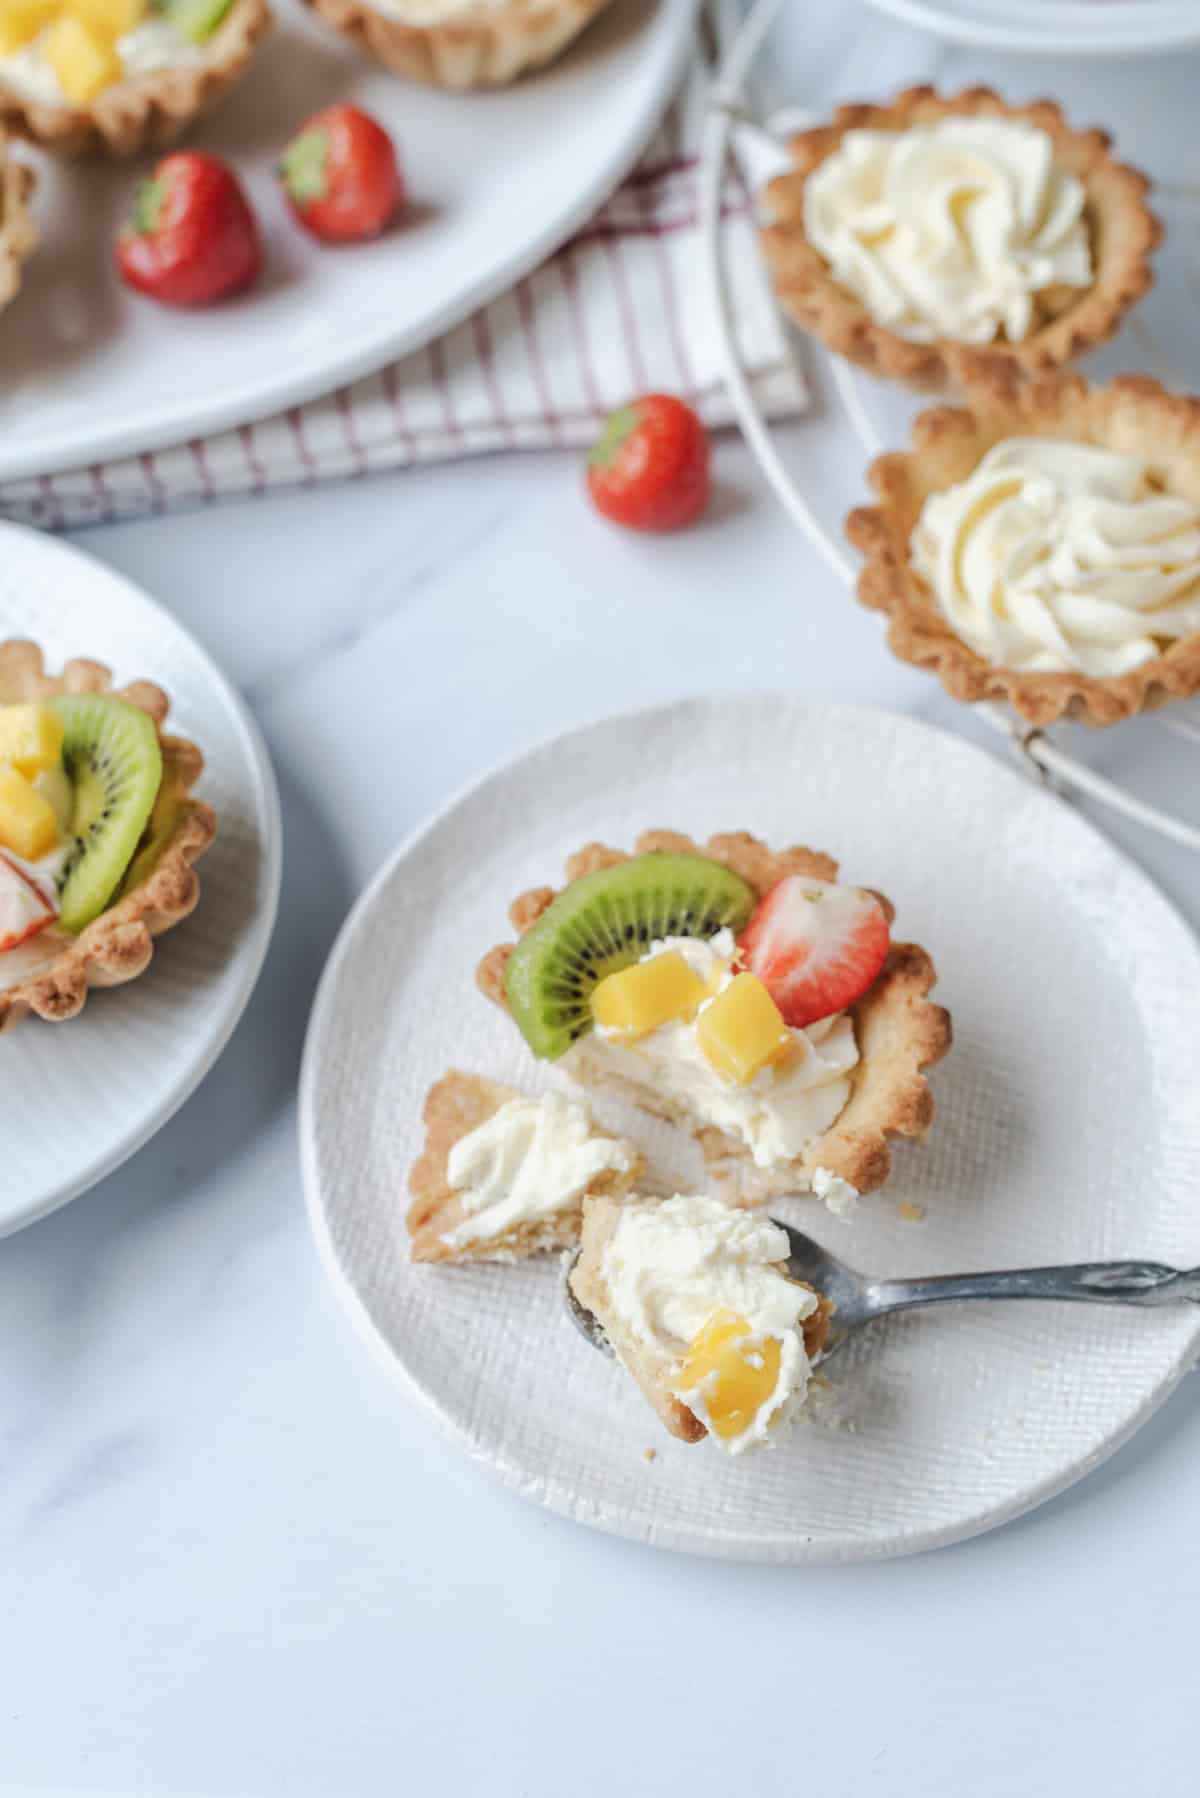
This refreshing, bite-sized dessert is perfect for picnics or entertaining!
Baking has always been a passion of mine. As a child, I loved experimenting with recipes, but it wasn’t until I had a kitchen of my own that the spark reignited. One summer, I dove into new recipes and techniques, rediscovering the magic of baking. Sure, the summer heat wasn’t ideal for an oven-heavy hobby, but I didn’t let that stop me. That season taught me that creativity in the kitchen is about making it work, no matter the challenges.
There was one recipe I kept coming back to that summer, one that didn’t require too much baking in the oven and was super refreshing on warm days: Fruit tarts. As long as I had the tart shell baked, I loved finding ways to fill it with juicy fruit and a delectable cream filling. It was always my go-to for picnics. After playing with different combinations of fruit, I realized I could also play with variations of the tart shell itself. And that’s where this mini recipe comes in!
The formula for these mini fruit tarts is pretty simple, but you can customize yours by adding whatever fruit you like, depending on what’s in season or your personal taste. I love using a mix of different berries, or a mix of fruits like kiwi, mango and pineapple for a more tropical finish. The tart dough comes together very easily in a food processor, but if you don’t have one, don’t worry—you can also use your hands. You will need an electric hand mixer or a standing mixer to mix the cream, though.
Are Mini Fruit Tarts Healthy?
Mini fruit tarts are undeniably delicious, but calling them “healthy” might be a stretch. Sure, they’re adorned with fresh fruit, but let’s not kid ourselves—the buttery tart shell, along with the mascarpone, cream cheese, and heavy cream in the filling, are more about indulgence than nutrition.
That said, sometimes you don’t need kale—you need dessert. Mini fruit tarts are a reminder that a little indulgence is good for the soul. Life’s too short to skip dessert, especially when it looks this good!
Why Does Butter Need To Be Cold When Making A Crust?
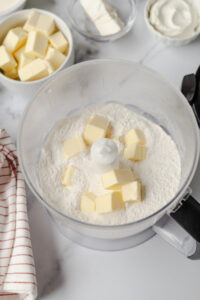
You’ll find that this recipe (and almost all other crust recipes) calls for cold butter. It’s crucial that your butter is cold if you want your tart shell to have a buttery, flaky crust. If the butter is melted or even room temperature, it may not coat the flour correctly to achieve the bread-crumb texture in the mixing process, which later becomes a perfect crust for these mini fruit tarts.
The pieces you cut the cold butter into should be approximately half-inch cubes. If you’re making your crust in the summer, like I was when I first started making this mini fruit tart recipe, you may even want to put your butter back in the fridge for another 10-15 minutes after cubing it and before adding it to the flour mixture. If the air in your kitchen is warm like the outdoor summer heat, your butter will likely begin melting even as you cut it into pieces. It’s good to be extra careful and keep it as cold as possible with more fridge time for optimal results.
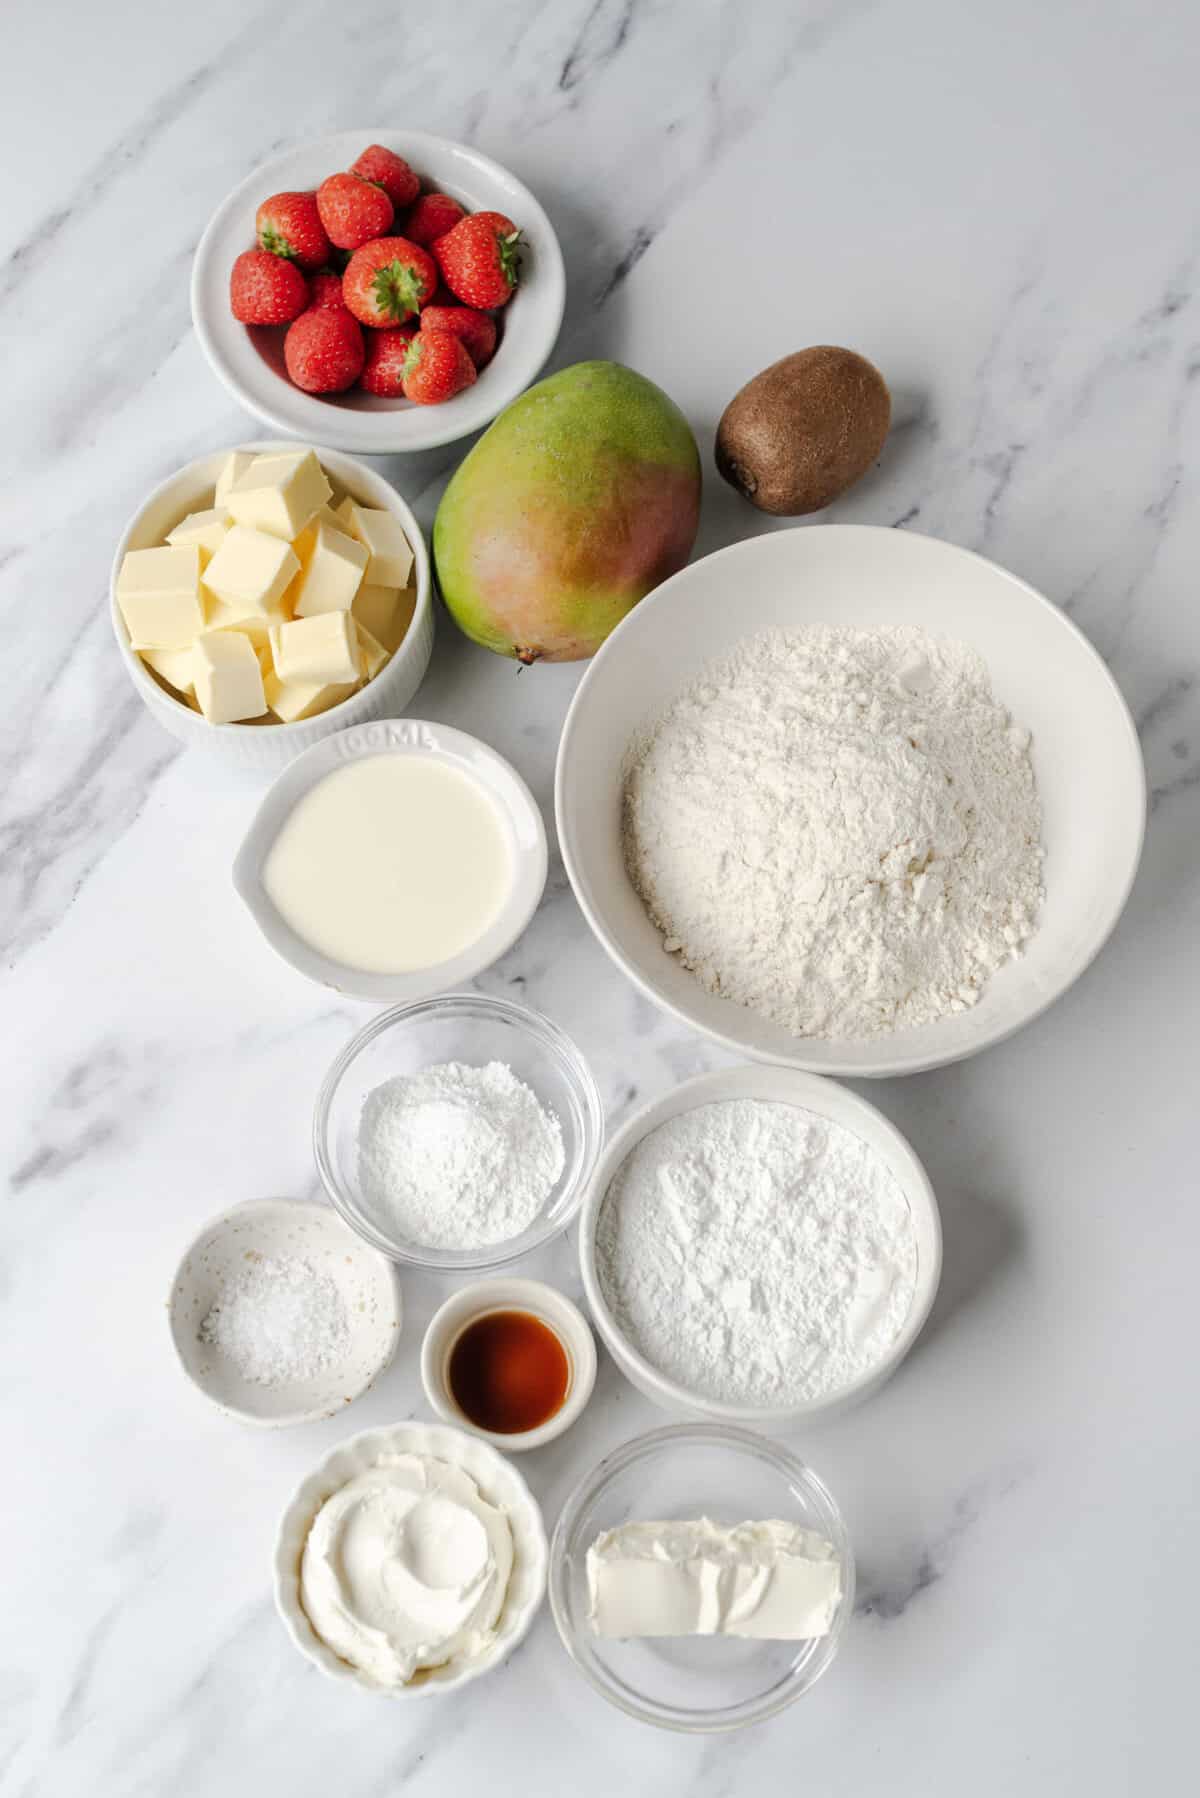
INGREDIENTS
- 1 1/4 cups all-purpose flour
- 1 pinch kosher salt
- 2/3 cup powdered sugar
- 3/4 cup unsalted butter, cold, cut into pieces
- 1 1/2 teaspoons vanilla extract
- 1/2 cup heavy whipping cream
- 1/4 cup mascarpone cheese
- 1/4 cup cream cheese, softened
- 2 tablespoons powdered sugar
- Assorted fresh fruit (such as berries, kiwi, or mango), for topping
INSTRUCTIONS
Prepare
Make and bake tart shells.
Mix
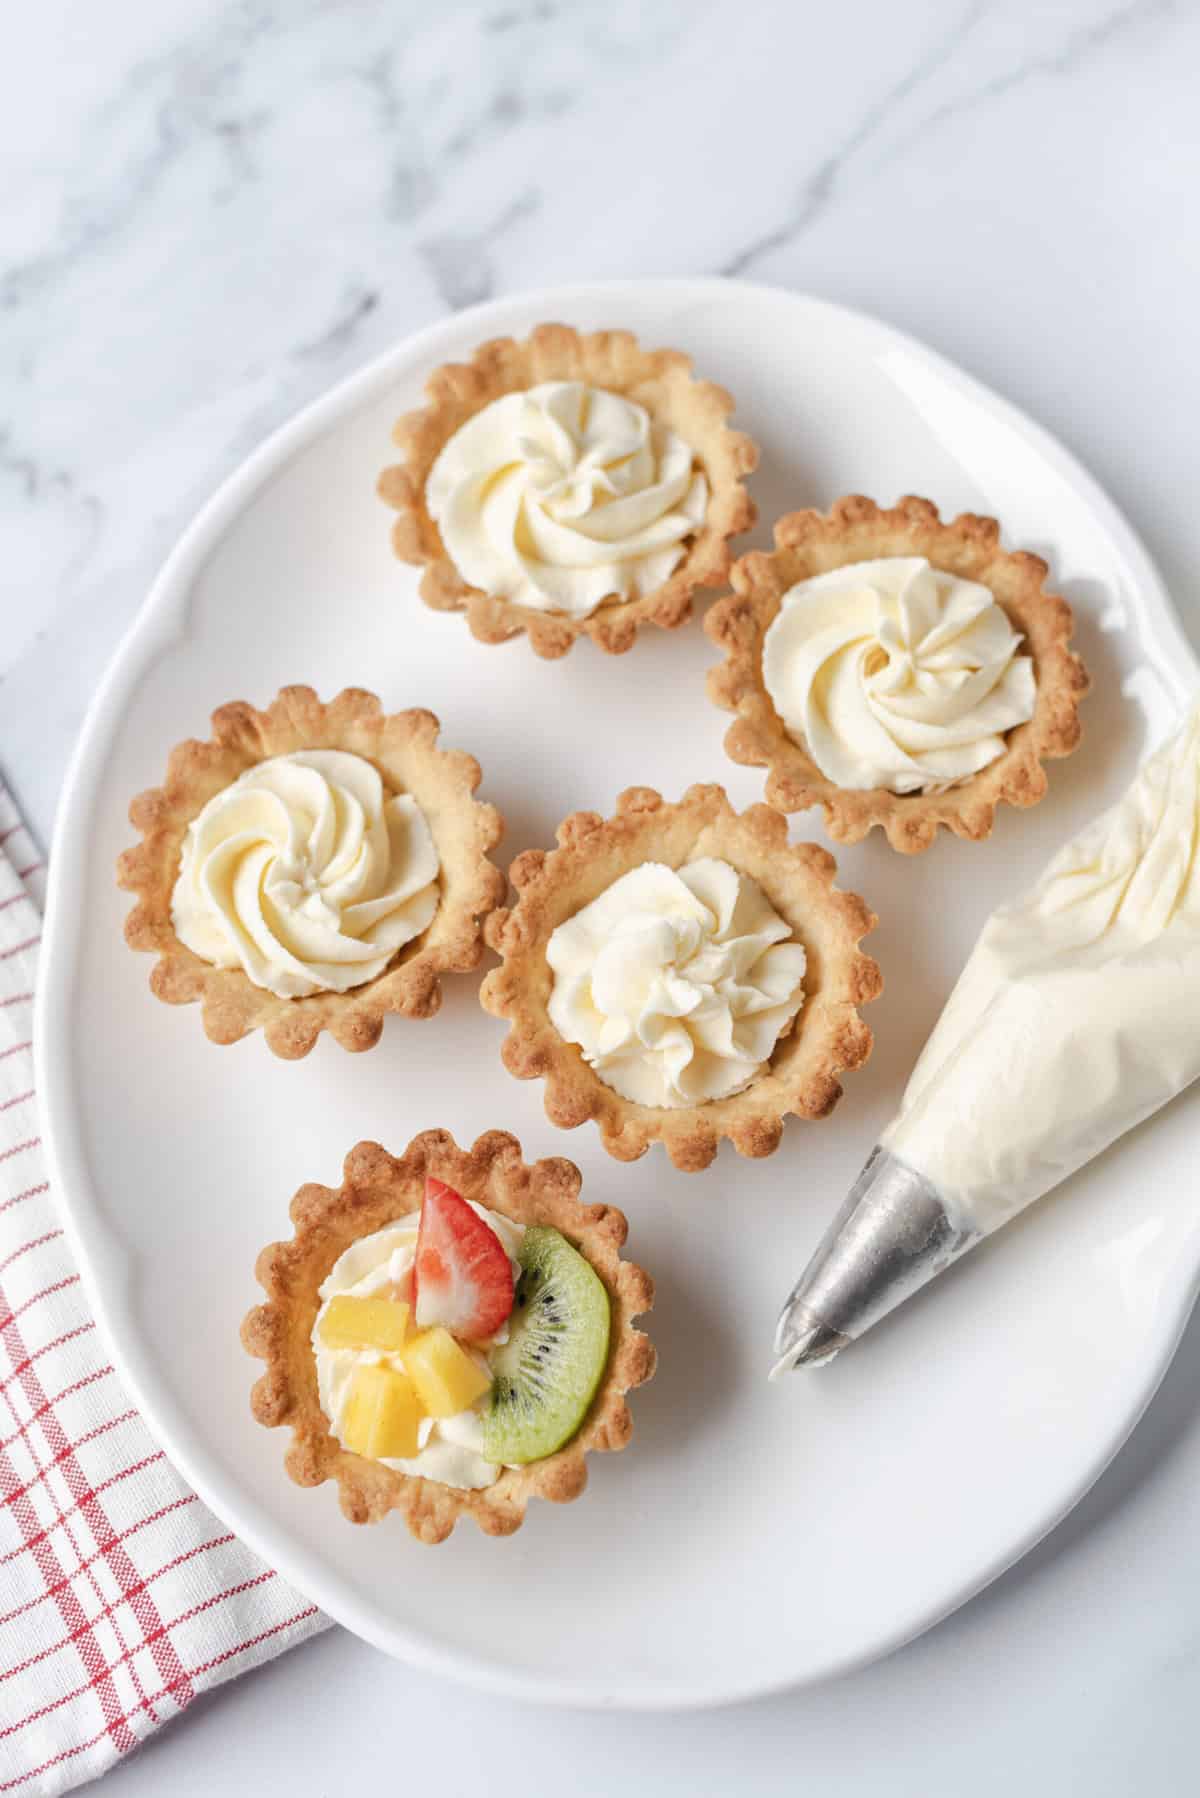
Whip filling and assemble tarts.
Decorate
Top with fresh fruit.
Devour!
FAQs & Tips
Making the tart shell and the cream filling are probably the two most time-consuming parts of this recipe. Luckily, they’re also the two elements that can be made in advance! This recipe calls for 30 minutes of chilling time for the tart dough before you roll it out. This is the minimum amount of time: you can extend the chilling time for up to 2 days. Once baked, you can also store the tart shells in the fridge for about 1 day before adding your fillings. If you’d like to make the cream mixture in advance, it will keep in the fridge for about 1-2 days.
If you’re using really fresh fruit, it’s likely that it’ll be emitting some delicious juices. Delicious, yes, but this could affect the aesthetic appeal of your mini fruit tarts by running into the cream. If you want to avoid this, let your cut-up fruit sit in a strainer for about 10-15 minutes before adding it to your mini tarts.
These mini fruit tarts are endlessly customizable: you can fill them with whatever fruit you like! But you can also customize the cream filling for even more additional fruity flavor. The secret ingredient? Citrus zest. Lemon or lime zest is always classic (you can add about a teaspoon, or to your liking), but I also really like adding orange zest too. It makes the cream filling taste like an orange Creamsicle!
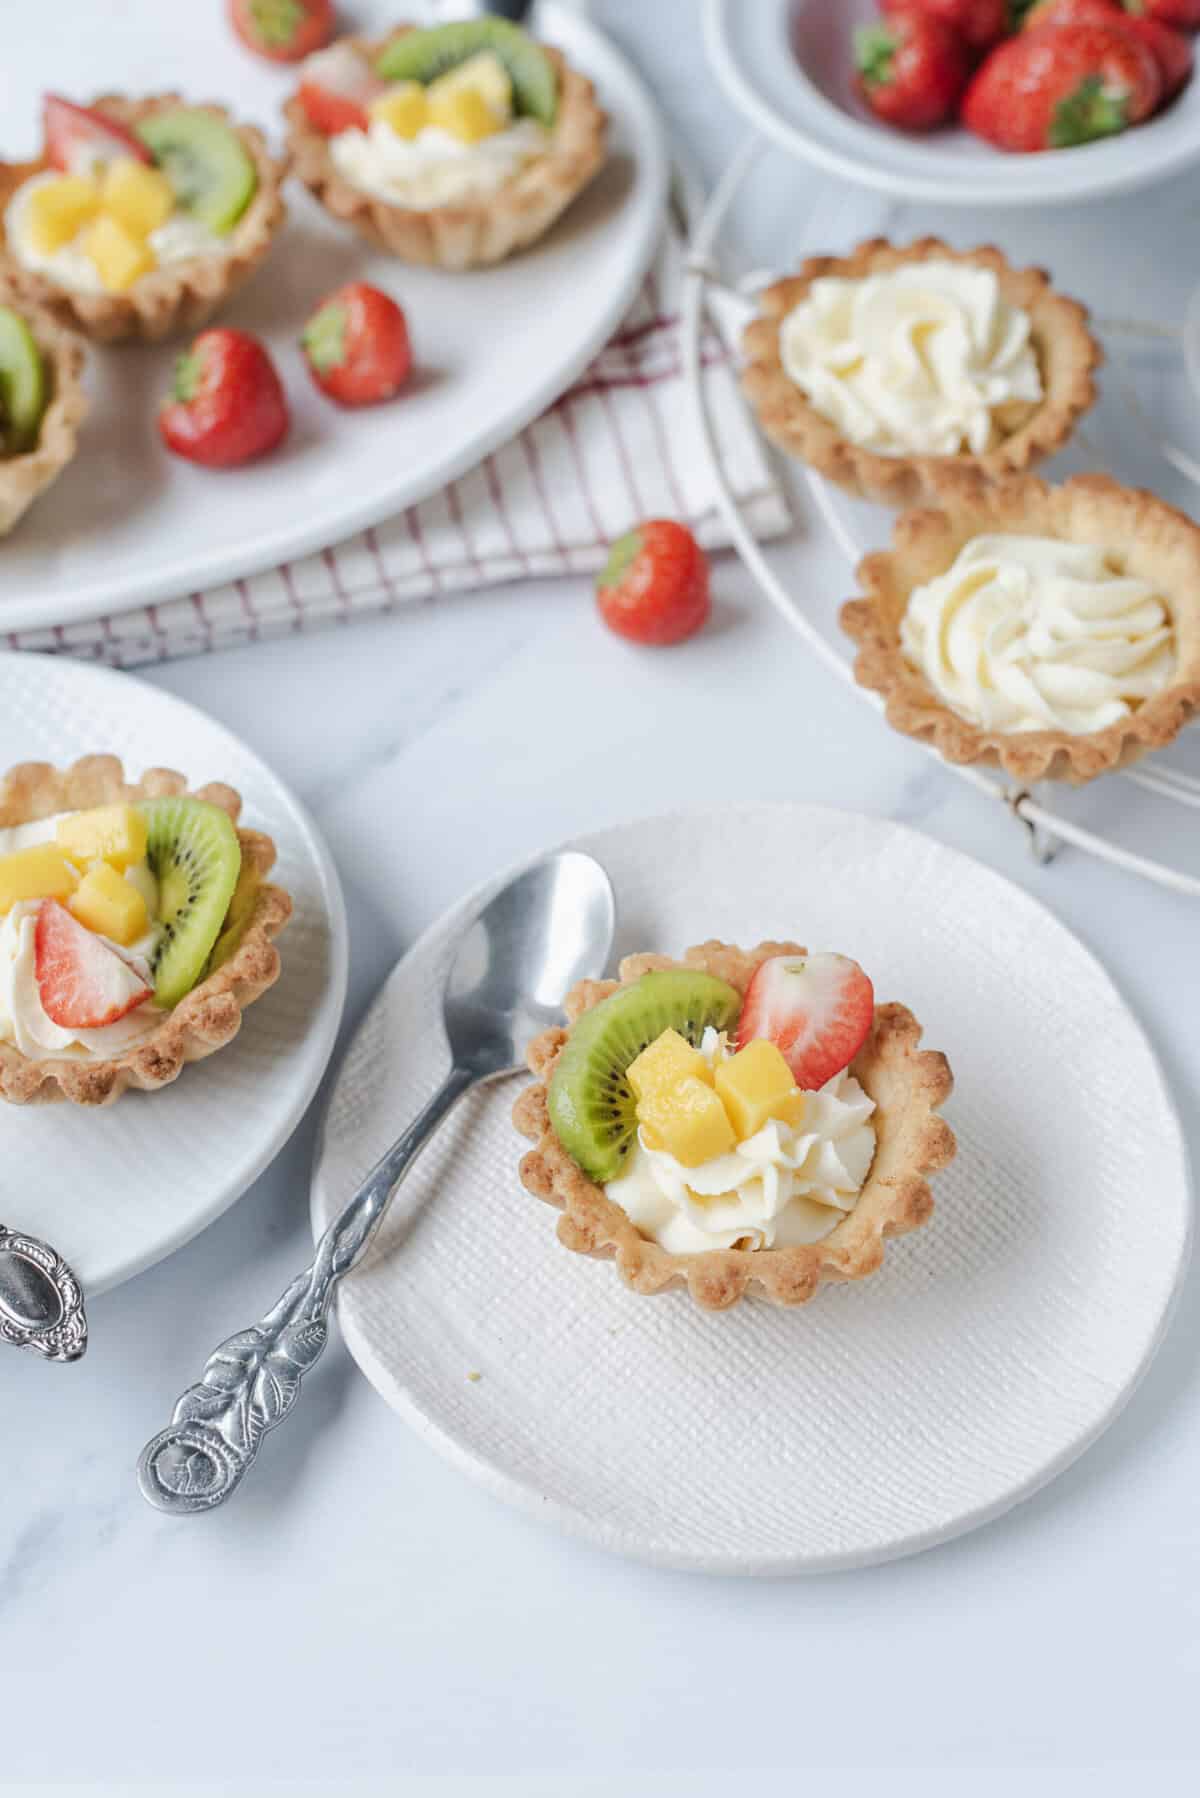
Serving Suggestions
These mini fruit tarts are a total showstopper at picnics! They also make a great option for entertaining at your own home, or for bringing to a potluck. Or, they could even be great for an at-home afternoon tea party.
If you want to pair your mini fruit tarts with even more bite-sized recipes, check out some of our appetizers like these Baked Salmon Sushi Cups or these Cream Cheese Stuffed Mushrooms. Want to continue the dessert vibe? These Peanut Butter Balls or these Gluten-Free Carrot Cake Truffles are sure to be a hit. Enjoy!

Mini Fruit Tart
Ingredients
- 1 1/4 cups all-purpose flour
- 1 pinch kosher salt
- 2/3 cup powdered sugar
- 3/4 cup unsalted butter cold, cut into pieces
- 1 1/2 teaspoons vanilla extract
- 1/2 cup heavy whipping cream
- 1/4 cup mascarpone cheese
- 1/4 cup cream cheese softened
- 2 tablespoons powdered sugar
- Assorted fresh fruit such as berries, kiwi, or mango, for topping
Instructions
-
In a food processor, pulse together flour, salt, and powdered sugar. Gradually add butter and 1/2 teaspoon vanilla extract until the mixture resembles coarse crumbs.

-
Press the dough into mini tart pans, forming an even layer at the bottom and sides. Chill in the refrigerator for 30 minutes.
-
Bake at 350°F for 15 minutes or until golden. Let cool.
-
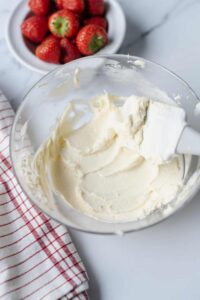
Whip together heavy cream, mascarpone, cream cheese, powdered sugar, and 1 teaspoon vanilla extract until light and fluffy, similar to the texture of stiff peaks. If it seems thick, you can add a splash more of cream to thin it.
-
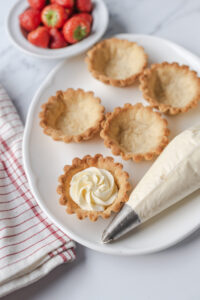
Spoon or pipe the filling into cooled tart shells. Top with fresh fruit of your choice.

Nutrition
The post Mini Fruit Tart appeared first on Food Faith Fitness.